Related Post

Multi-Light-Source Electrophoresis Gel Imaging: Dye Selection and Reproducibility Solution
2026-01-16Modern Electrophoresis Gel Imaging technology translates the migration of nucleic acids and proteins into legible bands and spots you can measure, compare, and defend. When the correct illumination, stain chemistry, and optics come together, invisible fragments become evidence – evidence that confirms an amplicon, validates a gene edit, checks protein purity, or keeps multi-site projects aligned.
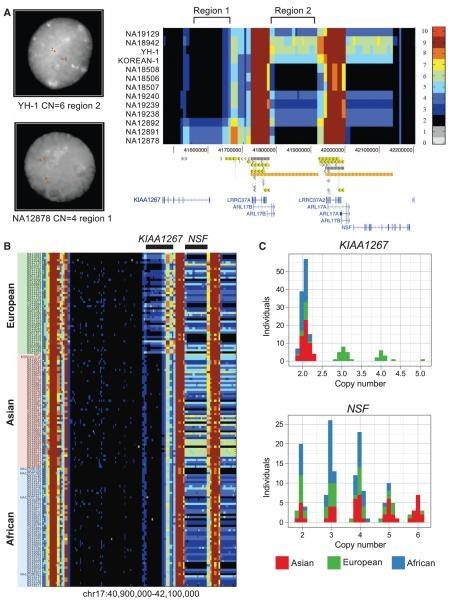
(A simple genotyping method to detect small CRISPR-Cas9
induced indels by agarose gel electrophoresis | Scientific Reports)
What Electrophoresis Gel Imaging Actually Does
In practice, electrophoresis gel imaging is the capture and quantification of DNA, RNA, and protein separation patterns on agarose or polyacrylamide gels. Dyes intercalate or bind to biomolecules; matched excitation light (UV or blue) and appropriate emission filters reveal the labeled targets, and a high-sensitivity camera records the scene. Get that chain right – chemistry, illumination, optics, and capture – and you gain consistent signal, a wide dynamic range, and reliable measurements you can reproduce.
This workflow has underpinned decades of discovery. Early Sanger sequencing depended on reading DNA fragments resolved on polyacrylamide gels. PCR rose to prominence as labs showed amplified fragments on agarose gels and documented the results. Foundational CRISPR-Cas9 studies demonstrated precise cleavage events with clean, interpretable bands. During the Human Genome Project, gel documentation systems were everywhere, validating PCR products and screening quality before downstream analysis. The pattern is clear: when imaging is sound, separation turns into data you can trust.
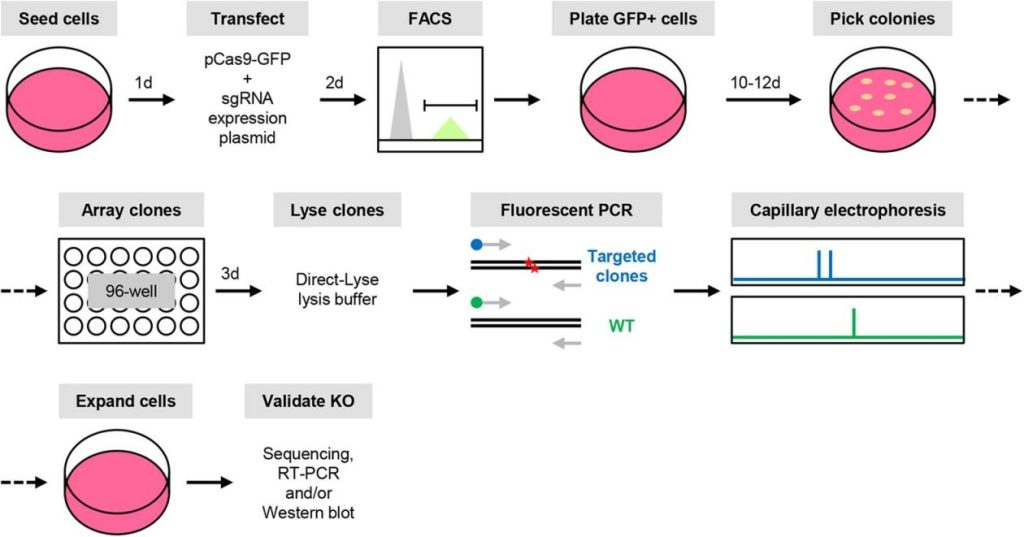
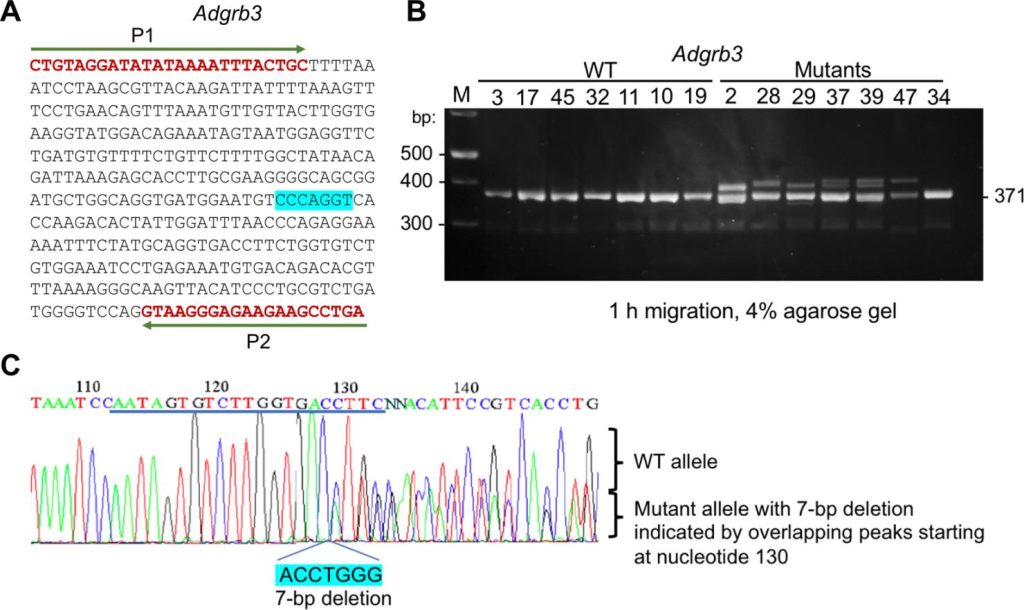
(High-throughput genotyping of CRISPR/Cas9-mediated mutants
using fluorescent PCR-capillary gel electrophoresis | Scientific Reports)
Common Pain Points that Erode Reproducibility
Despite its maturity, gel documentation can still generate variability and doubt. The chief culprits are dye-illumination misalignment, inconsistent capture configurations, and poor record hygiene.
- Dye-light mismatch: Ethidium bromide, SYBR Safe, GelRed, Coomassie, and fluorescent protein stains have discrete excitation/emission peaks. A catch-all light source suppresses true signal and raises background.
- Variability in exposure and focus: Manual parameter selection varies by user and run, biasing band intensity and making time-course comparisons difficult.
- UV exposure hazards: Lengthy UV illumination bleaches dyes and damages nucleic acids. Cutting gels without adequate shielding risks both personnel and samples.
- Annotation errors: Hand-entered ladder sizes foster mistakes and slow evaluation in shared datasets.
- Missing metadata: Not capturing illumination type, filter configuration, exposure, gain, and action traces decreases traceability and undermines audits.
- The fallout is predictable: siloed workflows, repeat imaging or do-overs, and weaker confidence in near-limit bands. A dye-aware, multi-light-source approach combined with standardized capture and robust metadata closes these gaps.
A Multi-Light-Source Workflow for Reliable Gel Documentation
Adopt a simple, method-driven approach that maps goals to dye chemistry and to the right illumination, then locks in capture and documentation.
- Define the endpoint: Are you checking presence/absence, confirming size, or doing semi-quantitative analysis? Pick a dye that matches your target (DNA, RNA, or protein) and the needed sensitivity and safety profile.
- Match dye to light: Use UV excitation for classic intercalators when you need top-end brightness and downstream DNA integrity is less of a priority. Choose blue-light excitation for next-gen dyes to preserve fragments for cloning or sequencing. Switch to white light for chromogenic protein staining and colony imaging.
- Standardize capture: Turn on auto exposure and autofocus to keep parameters consistent across users and days. Watch a live histogram and avoid saturation by setting fixed maximum thresholds.
- Anchor with a ladder: Include a molecular weight ladder in every gel. Use auto ladder recognition so band sizes are labeled consistently without manual effort.
- Record metadata by default: Log illumination type, filter, exposure, focus, operator, timestamps, and processing steps. Role-based approvals and thorough audit trails enable compliance and cross-team collaboration.
- Protect weak bands: Choose a high-sensitivity, low-noise sensor to bring out faint bands without overexposing bright lanes. Uniform backgrounds and flat-field illumination matter as much as raw megapixels.
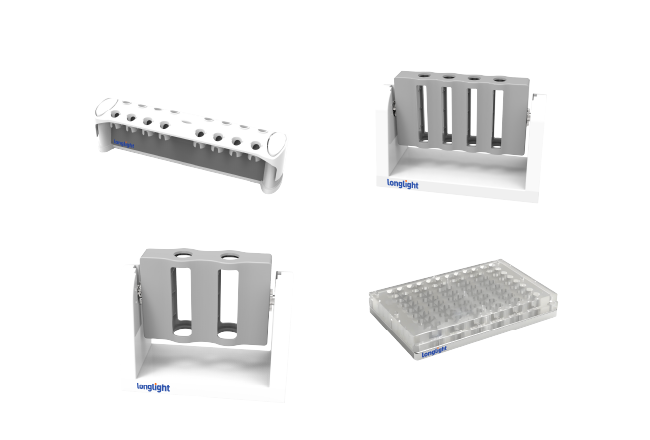
- Excise safely: For gel excision, use a UV-shield plate to protect users and safeguard fragment integrity. Capture time-stamped images before and after excision to maintain a traceable record.
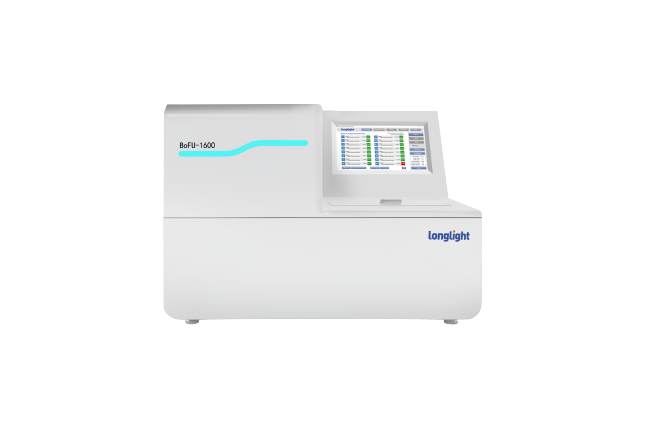
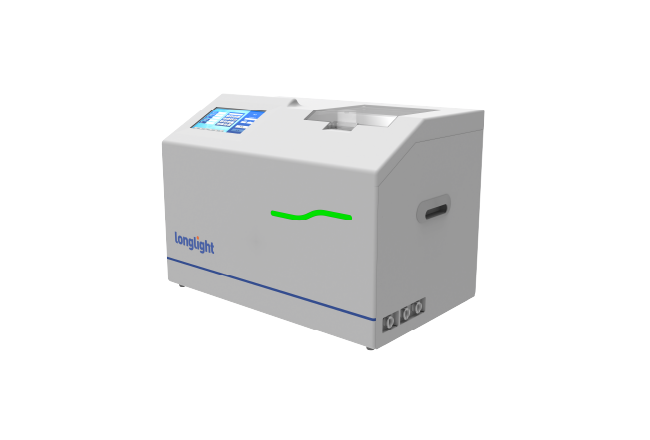
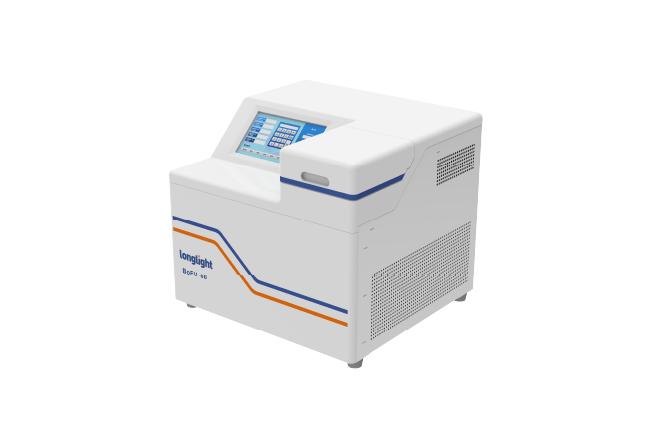
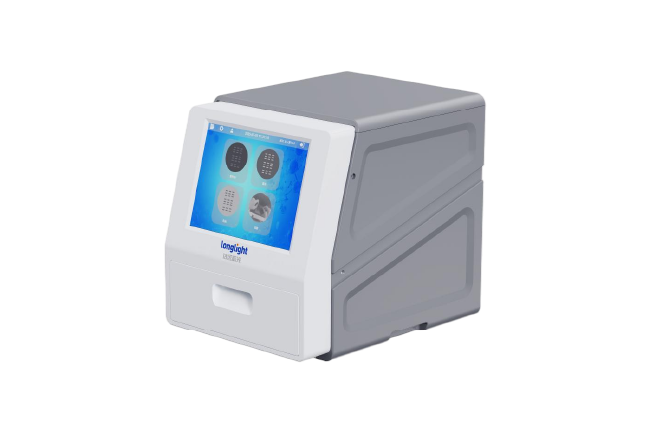
An Integrated System that Makes Consistency the Norm
A modern gel documentation system can consolidate optics, controls, and software in a single instrument so Electrophoresis Gel Imaging is repeatable across assays and teams. A bright, responsive touchscreen enables fast, onboard processing without an external computer, cutting training time. A high-sensitivity 6.3 MP CMOS camera delivers clear bands at low light levels, preserving dynamic range and protecting delicate samples.
Support for transmissive UV, blue, and white illumination lets you pick the best light for the stain – whether you’re imaging nucleic acid gels, protein gels, or stain-free workflows. Intelligent automation reduces busywork. Automatic exposure and focus keep imaging consistent. Enhancement can be applied as needed, while raw data remain available for re-analysis and audit purposes. Automatic ladder detection identifies markers and applies size labels to streamline documentation and decrease errors.
Traceability features such as role-based user management, categorized activity logs, and end-to-end audit trails establish a defensible record from acquisition to export. Safety accessories, including a UV-shield cutting plate, help protect users during gel excision and maintain sample quality.
Key benefits for multi-application labs include:
•High sensitivity with low background to detect weak bands and low-abundance targets.
•Broad stain compatibility that supports UV, blue, and white-light workflows.
•All-in-one operation with integrated touch control to minimize setup complexity.
•Automated capture and ladder annotation to reduce operator bias and variability.
End-to-end traceability via roles, logs, and audits for confident review.Best practices that raise image quality and confidence
Small habits compound into higher-quality, more reproducible outcomes:
•Keep gel thickness, buffer composition, and temperature steady to stabilize migration.
•Test stains under each light setting and save exposure presets linked to dye-light pairs.
•Refrain from quantitation in saturated lanes; verify linear range via serial dilutions when feasible.
•Regularly clean and service lenses and filters, and confirm flat, even illumination via test images.
•For cross-site work, share templates that harmonize ladder type, annotation guidelines, file naming, and export formats.
Applications Across the Bench
A robust gel doc system reaches beyond classic agarose gels. Use it to validate cloning inserts and sequencing prep, profile protein expression and purity on SDS-PAGE, document colony plates under white light, or capture multicolor fluorescent labels for multiplex readouts.Stain-free protein workflows benefit from gentle illumination and sensitive detection. In each scenario, multi-light-source control and automated capture compress rework, shorten review cycles, and improve the clarity of reports and publications.
- From Variable to Predictable
Electrophoresis Gel Imaging should not be a moving target. By aligning dye-aware illumination with high-sensitivity optics and audit-ready software, you replace trial-and-error with defined methods that scale across instruments and teams. Whether you’re harmonizing protocols in a growing lab, onboarding new staff, or preparing for regulatory inspections, a reproducible imaging stage raises confidence in every figure you publish and every decision you make downstream.
Call to Action
Bring reliable, sensitive electrophoresis gel documentation into your daily routine. Request a live demo with your preferred stains, compare UV versus blue-light performance side by side, and review a sample dataset complete with audit metadata. Our team will help you build dye-light presets, enable automatic ladder annotation, and set role-based approvals so your next gel is not only crystal clear, but also compliant and repeatable.